Destination Actions
Destination Actions are available for all Segment plans. Self-service plans are limited to two conditions per Trigger.
See the available plans, or contact Support.
The Destination Actions framework improves on classic destinations by enabling you to see and control how Segment sends the event data it receives from your sources to actions-based destinations. Each Action in a destination lists the event data it requires, and the event data that is optional.
You can also choose which event types, event names, or event property values trigger an Action. These Triggers and Mappings make it possible to send different versions of the Action, depending on the context from which it is triggered.
Each Actions-framework Destination you see in the Segment catalog represents a feature or capability of the destination which can consume data from your Segment source. The Action clearly lists which data from the events it requires and which data is optional. For example, Amplitude requires that you always send a LogEvent and Slack always requires a PostMessage. Each Action also includes a default mapping which you can modify.
Benefits of Destination Actions
The advantages of using Destination Actions include:
- Easier setup: Fewer initial settings which can decrease the time spent configuring the destination.
- Increased transparency: You can see the exact data that is sent to the destination and when Segment sends it. For example, users can see exactly when Segment sends an IP address to FullStory or an AnonymousId to Amplitude.
- Improved customization: You can determine which events from your sources trigger actions, and map the events to destination-supported actions. For example, you can define exactly which events are considered purchases by Braze.
- Partner ownership: Partners can own and contribute to any Actions-based destination that use cloud and device mode (web).
Available Actions-based Destinations
The following Actions-based Destinations are available:
Destination Actions compatibility
Destination Actions are available to all customers on all Segment plans. You do not need to disable or change existing destinations to use Destination Actions. However, to prevent data duplication in the destination tool, ensure that you are not sending data through both a standard destination and the Actions destination at the same time.
- You can use the Event Tester with Destination Actions. Event delivery metrics are collected and available in the destination information pages.
- If you are using Protocols, Destination Actions actions are applied after schema filters and transformations.
- If you are using Destination Filters, Actions are applied after the filters. They are not applied to data that is filtered out.
- Destination Actions can not be accessed or modified using the Segment APIs yet.
Components of a Destination Action
A Destination Action contains a hierarchy of components that work together to ensure the right data is sent to the destination.
| Component | Description |
|---|---|
| Global Settings | Define authentication and connection-related information like API and Secret keys. |
| Mappings | Handle the individual calls to the destination. In them, you define what type of call you want to make to the destination and what triggers that call. Individual Destination Actions may come enabled with some predefined mappings to handle common events like Screen calls, Identify calls, and Track calls. Mappings have 2 components that make this possible: Triggers and an Action. |
| Triggers | Allow you to define when the corresponding Action fires. As part of a Trigger, you can use condition-based filters to narrow the scope of the Trigger. Triggers don’t support matching on event fields containing .$ or .$., which reference an array type. Self-service users can add a maximum of 2 conditions per Trigger. |
| Actions | Determine the information sent to the destination. In the Configure action section, you map the fields that come from your source to fields that the destination expects to find. Fields on the destination-side depend on the type of action selected. |
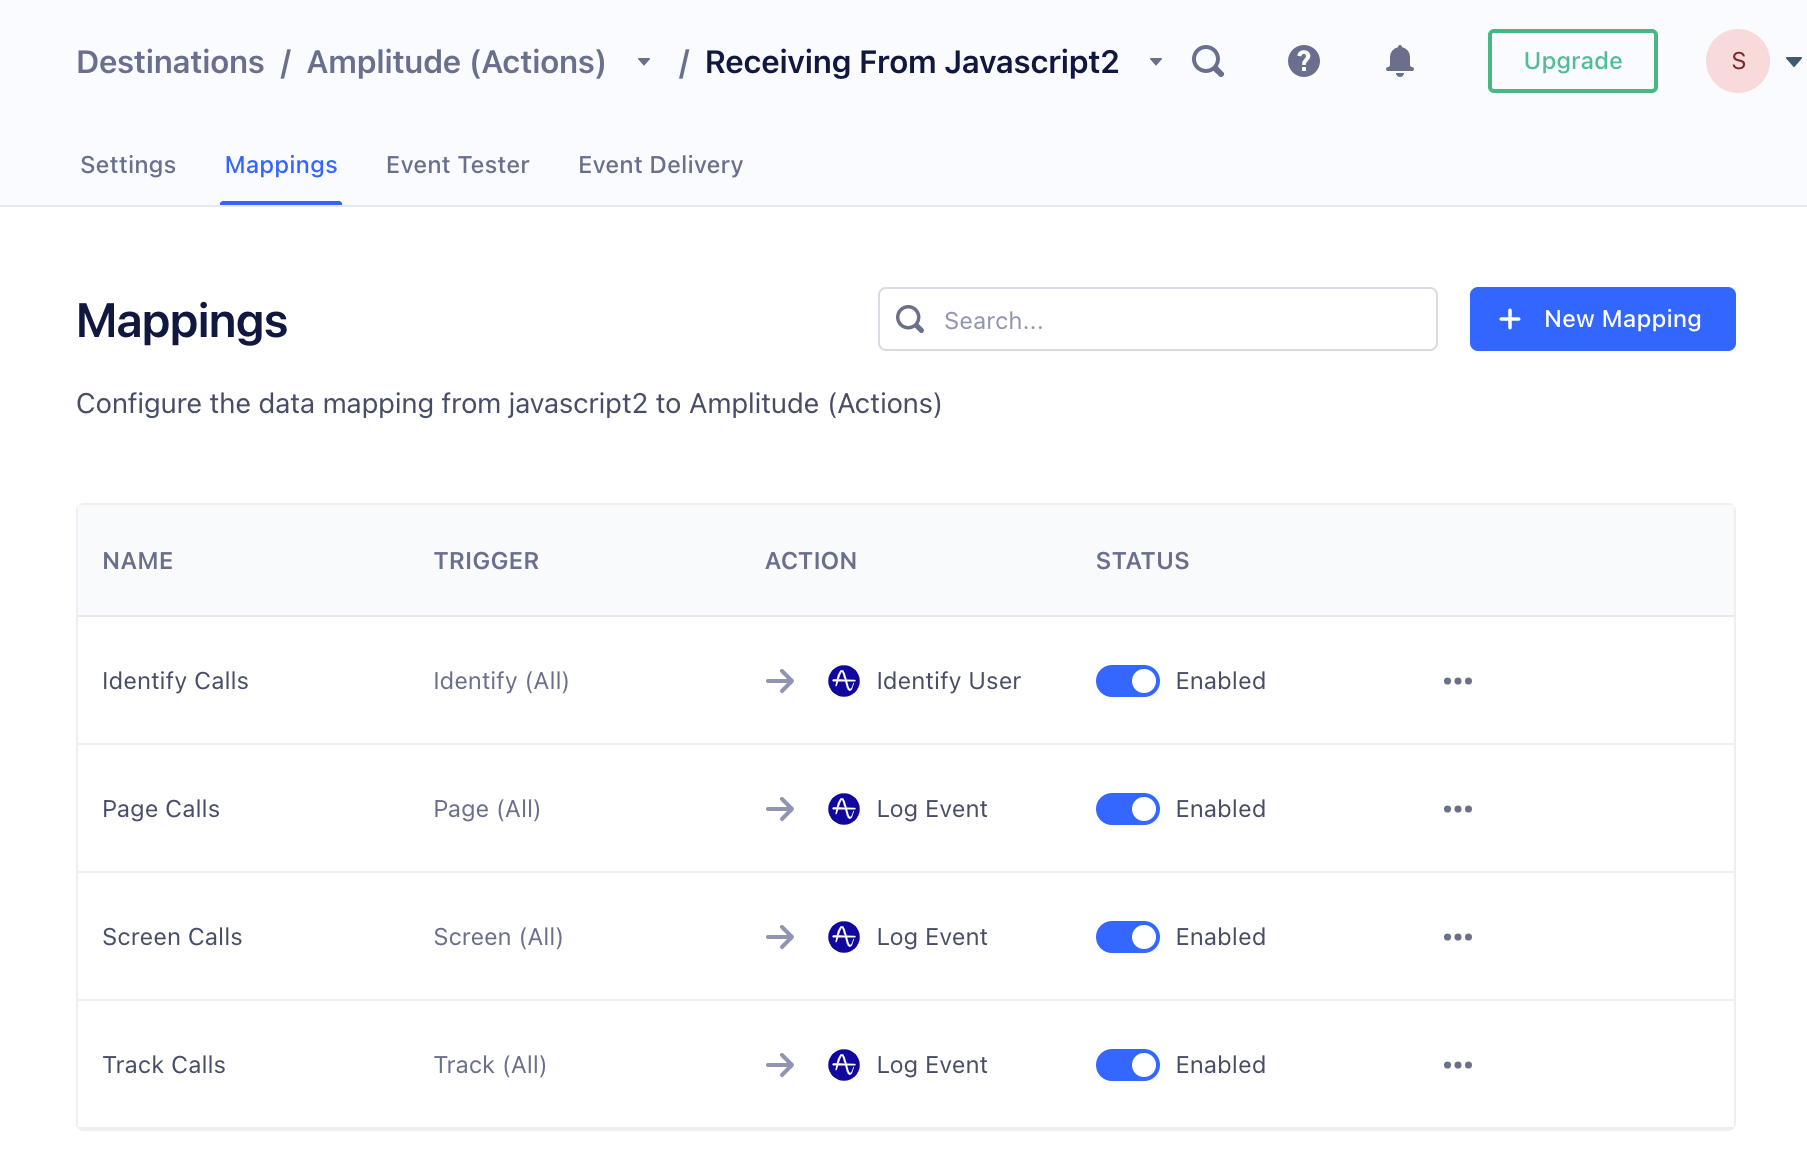
For example, in the Amplitude (Actions) destination, you define your API and Secret keys in the destination’s global settings. Then the provided Page Calls mapping:
- Triggers the action on all incoming Page events.
- Runs the Log Event action, to map your incoming data to Amplitudes properties.
Set up a destination action
To set up a new Actions-framework destination:
- Log in to the Segment Workspace you want to add your destination to. Go to the Connections > Catalog page and click the Destinations tab. You can also click Add Destination either from an existing Source or from your list of existing destinations.
- Select the Destination Actions category and select the destination you want to add.
- Click Add destination and configure your destination, selecting the source you want to connect to the new destination.
- Enter your credentials in the Settings of your new destination. This could be an API Key and Secret Key, or similar information that allows the destination to connect to your account.
- Next, go to Mappings to configure Actions. Add new mappings and select the Action you would like to use.
- (Optional) Click Suggest Mappings to get suggested mappings. Learn more about suggested mappings.
- Once you’re satisfied with your mappings, click Save and enable.
You must configure and enable at least 1 mapping to handle a connected source’s event(s) in an Actions-framework destination for data to flow downstream. Events flow downstream in the order in which they appear in the mappings UI. There is no mechanism available where you can control the order of events sent to the downstream destinations.
Migrate a classic destination to an actions-based destination
Moving from a classic destination to an actions-based destination is a manual process. Segment recommends that you use the following steps to do this:
- Create the actions-based destination with your development or test source.
- Copy API keys, connection details, and other settings from the classic destination to the actions-based destination.
- Refer to the actions-based destination’s documentation for information about how to migrate specific settings.
- Disable the classic version of the destinatio and enable the actions-based version.
- Verify that data is flowing from the development or test source to the partner tool.
- Repeat steps 1-5 with your production source.
Migrate your destination filters from the classic destination to the actions destination
You can only migrate your destination filters using the Public API if you are on the Segment Business Tier plan. This functionality isn’t available in the Segment app.
To migrate your destination filters to your actions destination from the classic destination:
- Send a request to the Public API endpoint.
- Use List Filters from Destination. You can find
destinationIdin the page URL while viewing the destination in your Segment workspace.
- Use List Filters from Destination. You can find
- Grab the response and parse through the
data.filtersobject. Each object returned inside thedata.filtersobject is an individual filter associated with the specified destination. - Send individual
POSTrequests to the Public API endpoint.- Use Create Filter for Destination, for each of the filters from step 2.
- Specify the Actions
destinationId, found in the URL of that destination. The body of the request is the individual filters from step 2.
- If the bodies of those requests don’t already include the field
"enabled": true, make sure to enable each of those filters after you create them.
Migrate to an actions-based destination using Destination Filters
For a more comprehensive migration from a classic destination to an actions-based destination, use Destination Filters. This implementation strategy is only available to customers on a Segment Business Tier plan with access to Destination Filters. By adding an extra line of defense with Destination Filters, you reduce the chance of duplicate events or dropped events and ensure that only events sent before or after a specified received_at timestamp are sent to each destination.
This approach involves configuring a destination filter on both the Classic and Actions destinations.
- Configure the classic destination filter to block events by the
received_atfield with a certain value. - Set up the Actions destination to drop events until the
received_attimestamp field reaches that same value.
While Destination Filters within the UI cannot access any top-level fields, such as received_at, this is not a limitation for Destination Filters created by the Public API using Filter Query Language (FQL). Since received_at is a top-level field in the payload, you need to create a destination filter with the Public API and submit the request with that FQL information described below.
By combining these Filters, Segment sends events through the Classic integration up until a specified time and then blocks events after that. The Actions integration then blocks events until that specified time and only allows events beginning at that specified time.
The following code samples show you how you can create filters for your destinations using the Create Filter for Destination Public API operation.
Classic destination
Endpoint: POST https://api.segmentapis.com/destination/classic_destination_id_from_url/filters
// JSON BODY :
{
  "sourceId": "add_source_id_here",
  "destinationId": "classic_destination_id_from_url",
  "title": "drop event after (timestamp) received_at > value April 4, 2023 19:55pm",
  "description": "drop event after (timestamp) received_at > value April 4, 2023 19:55pm",
  "if": "(received_at >= '2023-04-21T19:55:00.933Z')",
  "actions": [
    {
      "type":"DROP"
    }
  ],
  "enabled": true
}
Actions destination
Endpoint: POST https://api.segmentapis.com/destination/actions_destination_id_from_url/filters
// JSON BODY :
{
  "sourceId": "add_source_id_here",
  "destinationId": "actions_destination_id_from_url",
  "title": "drop event before (timestamp) received_at < value April 4, 2023 19:55pm",
  "description": "drop event before (timestamp) received_at < value April 4, 2023 19:55pm",
  "if": "(received_at < '2023-04-21T19:55:00.933Z')",
  "actions": [
    {
      "type":"DROP"
    }
  ],
  "enabled": true
}
After configuring the Destination Filter on both the Classic and Actions destination, go to each destination’s Filters tab and enable the filters. After completing the migration, you can disable the Classic destination on the Settings page and remove each of the filters from both destinations.
Edit a destination action
You can add or remove, disable and re-enable, and rename individual actions from the Actions tab on the destination’s information page in the Segment app. Click an individual action to edit it.
From the edit screen you can change the action’s name and mapping, and toggle it on or off. See Customizing mappings for more information.
When an Action is created, it is disabled by default. This ensures that it’s only used after being fully configured. To begin sending data through an Action, enable it on the Actions page by clicking the toggle so that it appears blue.
Disable a destination action
If you find that you need to stop an action from running, but don’t want to delete it completely, you can select the action and click the toggle next to the action’s name to disable it. This takes effect within minutes, and disables the action until you re-enable it.
Delete a destination action
To delete a destination action, select the action, click … and select Delete.
This takes effect within minutes, and removes the action completely. Any data that would have gone to the destination is not delivered. Once deleted, the saved action cannot be restored.
Test a destination action
To test a destination action, follow the instructions outlined in Event Tester. You must enable a mapping to test the destination. If a mapping is not enabled, the following error message will appear: You may not have any subscriptions that match this event.
You can also test within the mapping itself. To test the mapping:
- Navigate to the Mappings tab of your destination.
- Select a mapping and click the … and select Edit Mapping.
- In the “Define event trigger” step, click Load event from source to add a test event from the source. You can also select Generate sample event which allows Segment to generate a sample event for you, or enter your own event.
- In the “Send test record” step, click Send test event to test the mapping and view the response from the destination.
Test Mapping might not return the events you're looking for
Segment only surfaces a small subset of events for the Test Mapping feature and might not always return the event you’re looking for. To test with a specific event, copy a specific event from your Source Debugger and paste it into the Add test event interface.
Customize mappings
If you use the default mappings for a destination action, you don’t need to customize the mapping template for the action. You can edit the fields later if you find that the defaults no longer meet your needs.
Destination limit
Actions-based destinations have a limit of 50 individual mappings.
To create a custom destination action, start from the Actions tab. If necessary, click New Mapping to create a new action.
- In the edit panel, define the conditions under which the action should run.
- Test those conditions to make sure that they correctly match an expected event. This step looks for events that match the criteria in the debugger queue, so you might need to trigger some events with the expected criteria to test your conditions. You can skip the test step if needed, and re-try it at any time.
- Select data models to enrich your events with.
- Set up the data mapping from the Segment format to the destination tool format.
- You can click the Source field, then select previously configured Enrichments from the Event Properties tab.
- Test the mapping with data from a sample event. The edit panel shows you the mapping output in the format for the destination tool. The Select Object option sends the entire object from the event, while the Edit Object option lets you map each individual property. You can change your mapping as needed and re-test.
- When you’re satisfied with the mapping, click Save. Segment returns you to the Mappings table.
- In the Mappings table Status column, verify that the Enabled toggle is on for the mapping you just customized.
The required fields for a destination mapping appear automatically. Click + to see optional fields.
Suggested Mappings
Suggested Mappings is fully available for RETL mappings, and is in public beta for event streams and connections.
Segment offers suggested mappings that automatically propose relevant destination fields for both model columns and payload elements. For example, if your model includes a column or payload field named transaction_amount, the feature might suggest mapping it to a destination field like Amount or TransactionValue. This automation, powered by intelligent autocompletion, matches and identifies near-matching field names to streamline the setup.
To use Suggested Mappings, the workspace owner must first accept the Customer AI Terms and Conditions. Ensure that you review the suggested mappings for accuracy before finalizing them as the suggestions are not guaranteed to be 100% accurate.
For more information, see Segment’s Suggested Mappings blogpost and the Suggested Mappings Nutrition Label.
Static values
Segment supports 4 static value types in Destination Actions mappings: string, boolean, number, and null.
- To create a
stringstatic value, type the string directly into the input field. - To create
boolean,number, andnullvalues, use the Static values tab to create the appropriate static value based on its type.
Functions
In Destination Actions mappings, functions transform event data before it sends to the destination. This enables custom data handling, such as selecting non-null values or formatting fields.
Coalesce function
The Coalesce function takes a primary value and uses it if it is available. If the value isn’t available, the function uses the fallback value instead.
Case function
The Case function allows you to change the casing of a given string value.
JSON function
The JSON function allows you to convert an object or array to a JSON encoded string, or to convert from JSON to objects.
Flatten function
The Flatten function allows you to flatten a nested object to an object with a depth of 1. Keys are delimited by the configured separator. For example, an object like {a: { b: { c: 1 }, d: 2 } } will be converted to { ‘a.b.c’: 1, ‘a.d’: 2 }.
Replace function
The Replace function allows you to replace a string, integer, or boolean with a new value. You have the option to replace up to 2 values within a single field.
Concatenate function
To combine 2 values in the event variable field, you can concatenate them using plain text and variables together. For example, to prepend the country code to a phone number, enter +1. Segment evaluates this field as a string, so placing text next to a variable automatically concatenates them.
You can’t concatenate event variables and plain text with static values and functions. Adding a static value or function into an input field replaces any previously added event variables and plain text.

Conditions
Self-service users can add a maximum of 2 conditions per Trigger.
Mapping fields are case-sensitive. The following type filters and operators are available to help you build conditions:
- Event type (
is/is not). This allows you to filter by the event types in the Segment Spec. - Event name (
is,is not,contains,does not contain,starts with,ends with). Use these filters to find events that match a specific name, regardless of the event type. - Event property (
is,is equals to,is not,is not equals to,less than,less than or equal to,greater than,greater than or equal to,contains,does not contain,starts with,ends with,exists,does not exist). Use these filters to trigger the action only when an event with a specific property occurs.
You can specify nested properties using dot notation, for example context.app.name. If a property might appear in multiple formats or locations, you can use an ANY statement and add conditions for each of those formats. For example, you might filter for both context.device.type = ios and context.os.name = "iPhone OS ". The does not exist operator matches both a null value or a missing property.
The available operators depend on the property’s data type:
| Data Type | Supported Operators |
|---|---|
| string | is, is not, contains, does not contain, starts with, ends with |
| string or numeric | is less than, is less than or equal to, is greater than, is greater than or equal to |
| boolean | is true, is false |
You can combine criteria in a single group using ALL or ANY. Use an ANY to “subscribe” to multiple conditions. Use ALL when you need to filter for very specific conditions. You can only create one group condition per destination action. You cannot created nested conditions.
Unsupported special characters in trigger fields
Trigger fields don’t support double quotes (") or the tilde (~) character.
Mapping field limitations
In destination fields, you can use dot notation to create nested objects and arrays, such as info.name or info[0].email. This is not the case if the field is enclosed in double quotes. For example, "user.email" creates a literal key, not a nested structure.
In source fields, dots are only supported for accessing object keys. Literal strings that include a dot, like user.email, aren’t supported as property names.
Destination Filters
Destination Filters are compatible with Destination Actions. Consider a Destination Filter when:
- You need to remove properties from the data sent to the destination.
- You need to filter data from multiple types of call, for example, Track, Page, and Identify calls.
If your use case does not match these criteria, you might benefit from using Mapping-level Triggers to match only certain events.
Duplicate Mappings
You can use the Duplicate Mappings feature to create an exact copy of a mapping. The duplicated mapping has the same configurations and enrichments as your original mapping.
Duplicate Mappings supports Actions destinations, Reverse ETL destinations, and destinations connected to Engage Audiences and Journeys.
To duplicate your mappings:
- Navigate to Connections > Destinations and select the destination with the mappings you’d like to copy.
- On the destination’s Mappings tab, select the menu button (…) and click Duplicate Mapping.
- Review the popup and click Duplicate Mapping.
Segment creates a disabled mapping with the name “Original Mapping Name (Copy)”. You must enable the mapping for data to flow.
FAQs and troubleshooting
Why does a validation error appears when using the Event Tester?
When you send an event with an actions destination Event Tester that doesn’t match the trigger of any configured and enabled mappings, an error message that states You may not have any subscriptions that match this event will appear.
To resolve the error, create a mapping with a trigger to handle the event being tested, or update the test event’s payload to match the trigger of any existing mappings.
Why is the data not sending downstream?
If no mappings are enabled to trigger on an event that has been received from the connected source, the destination will not send any events. Ensure that at least 1 mapping has been configured and enabled in the destination mappings for an event that you would like to reach downstream.
Events without mappings enabled to handle them display as being discarded due to “No matching mapping” in a destination’s Delivery Overview.
Why are multiple mappings triggered by the same event?
When an event triggers multiple mappings, a request is generated for each mapping configured to trigger on the event. For example, if two mappings are enabled for the Subscription Updated event and both mappings have conditions defined to trigger on the ‘Subscription Updated’ event, two requests will be generated and sent to the destination for each event - one for each mapping.
Why is an OAuth “access token expired” message appearing in Segment?
Access tokens generated during initial authorization are short-lived, for example, when you connect a destination via OAuth. The token typically remains valid for 30 minutes to 1 hour. When Segment receives a 401 error response from a destination after a token expires, it will automatically request the destination for a new token and will then retry the event. Therefore, 401 responses are sometimes expected and do not indicate an event failure. There are 3 event flows when events are received and sent to a destination:
- through source.
- through event tester.
- through actions tester in mapping screen.
The underlying systems for these flows have their own copy of the token, which can expire at different points in time. If you see a 401 error in a sample response, it is likely that another request was made afterward to fetch a new token. Then one more request was made to actually send the data in your payload to the downstream destination.
Is it possible to map a field from one event to another?
No. Segment integrations process events through mappings individially. This means that no context is held that would allow you to map a value from one event to the field of a subsequent event.
Each event must include all of the data you’d like to send downstream. For example, you can’t send email field in an Identify call and then access it later on a Track unless that Track call also includes the email field.
Why do I get a “Couldn’t load page” error when viewing or editing a mapping?
This error might occur due to a browser cache conflict or if an event property name includes a / character. To fix this:
- Try clearing your browser cache or opening the mapping page in an incognito/ private window.
- Check whether the mapped property name contains a
/. If it does, rename the property to remove the/and update the mapping.
This page was last modified: 09 Jul 2025
Need support?
Questions? Problems? Need more info? Contact Segment Support for assistance!